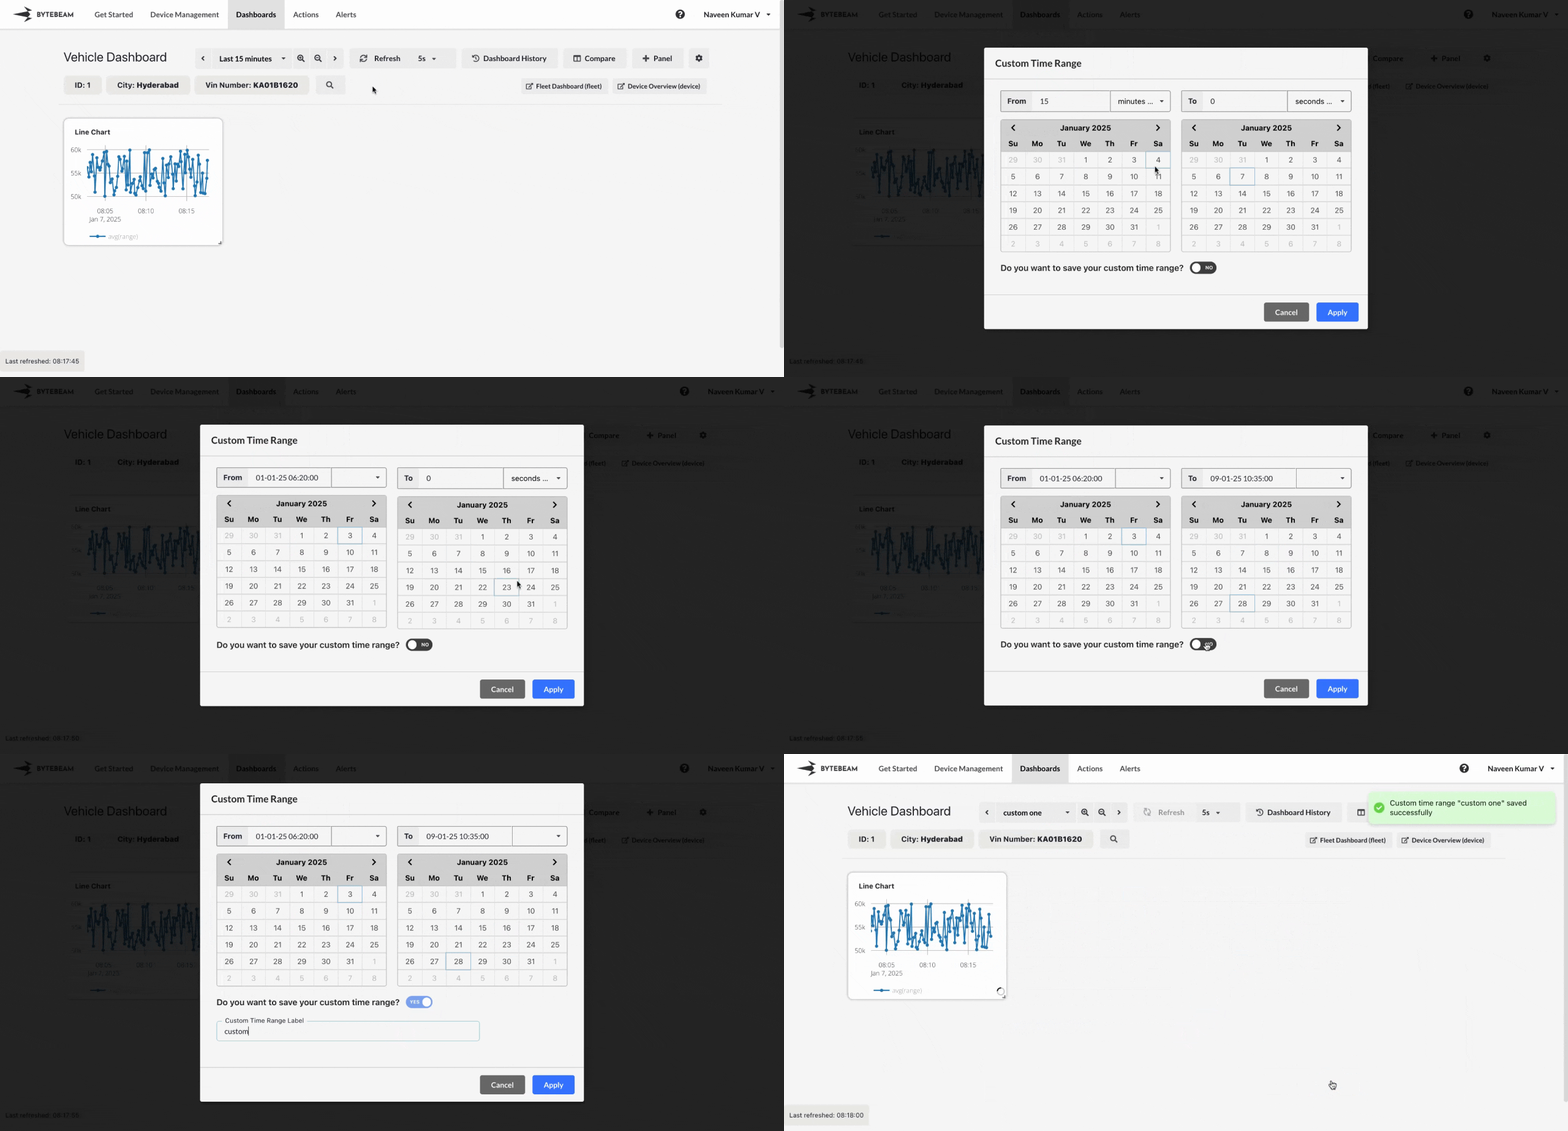
 The Custom Time Range feature allows you to set specific time ranges for analyzing dashboard data. You can choose exact dates or relative time options and even save custom ranges with labels for future use. This feature ensures flexibility in viewing data and quick access to frequently used time ranges.
Steps to Use Custom Time Range
Navigate to the Dashboard
Go to the Dashboards tab in the Bytebeam console and open the dashboard where you want to use the custom time range feature.
Open the Time Range Dropdown
Inside the dashboard, click on the Time Range dropdown located in the toolbar, and select the Custom Time Range option.\

Set Specific Dates
- In the Custom Time Range modal:
- Use the From and To date pickers to select specific dates, months, and years for the time range.
- Enable the toggle to save the custom time range and enter a Label name to save the custom time range for future use.

Set Relative Time Options
- Alternatively, use the From and To dropdowns to select relative time options like:
- 15 minutes ago
- 30 minutes ago
- 45 minutes ago, etc.
- For example:
- Set From to “45 minutes ago.”
- Set To to “30 minutes ago.”
- Enable the toggle to save the custom time range and enter a Label name for future reference.

Manage Labels
- To delete an existing label that is no longer needed:
- Click on the same toggle which is used to save the custom time range that will show the previously added labels
- Select the label you wish to delete, click on the cross icon and confirm the action.

Custom time ranges can be saved with meaningful labels to enhance usability. Users can choose specific dates or relative time ranges to suit their data analysis needs.