package main

import (
	"bufio"
	"encoding/json"
	"fmt"
	"io/ioutil"
	"net"
	"strconv"
	"time"
)

func readCPUTemperature() float64 {
	data, err := ioutil.ReadFile("/sys/class/thermal/thermal_zone0/temp")
	if err != nil {
		fmt.Println("Error reading temperature:", err)
		return 0.0
	}
	tempStr := string(data)
	tempInt, err := strconv.Atoi(tempStr[:len(tempStr)-1])
	if err != nil {
		fmt.Println("Error parsing temperature:", err)
		return 0.0
	}
	return float64(tempInt) / 1000.0
}

func sendData(conn net.Conn, payload map[string]interface{}) {
	data, _ := json.Marshal(payload)
	fmt.Println(string(data))
	conn.Write(append(data, '\n'))
}

func main() {
	conn, err := net.Dial("tcp", "localhost:5050")
	if err != nil {
		fmt.Println("Error connecting:", err.Error())
		os.Exit(1)
	}
	defer conn.Close()

	fmt.Println("Starting Uplink Bridge App")
	sequence := 1
	for {
		time.Sleep(5 * time.Second)
		temp := readCPUTemperature()
		t := time.Now().UnixNano() / int64(time.Millisecond)
		payload := map[string]interface{}{
			"stream":    "temperature",
			"sequence":  sequence,
			"timestamp": t,
			"temp":      temp,
		}
		sendData(conn, payload)
		sequence++
	}
}
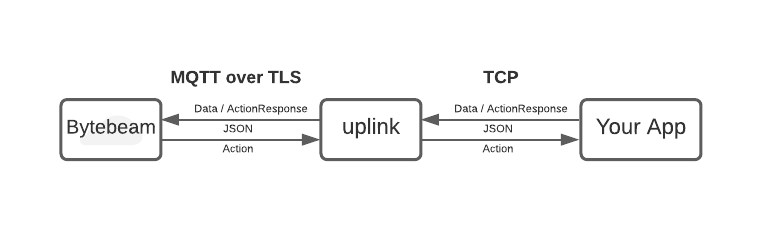 As an example, this guide assumes you are pushing temperature data to Bytebeam.
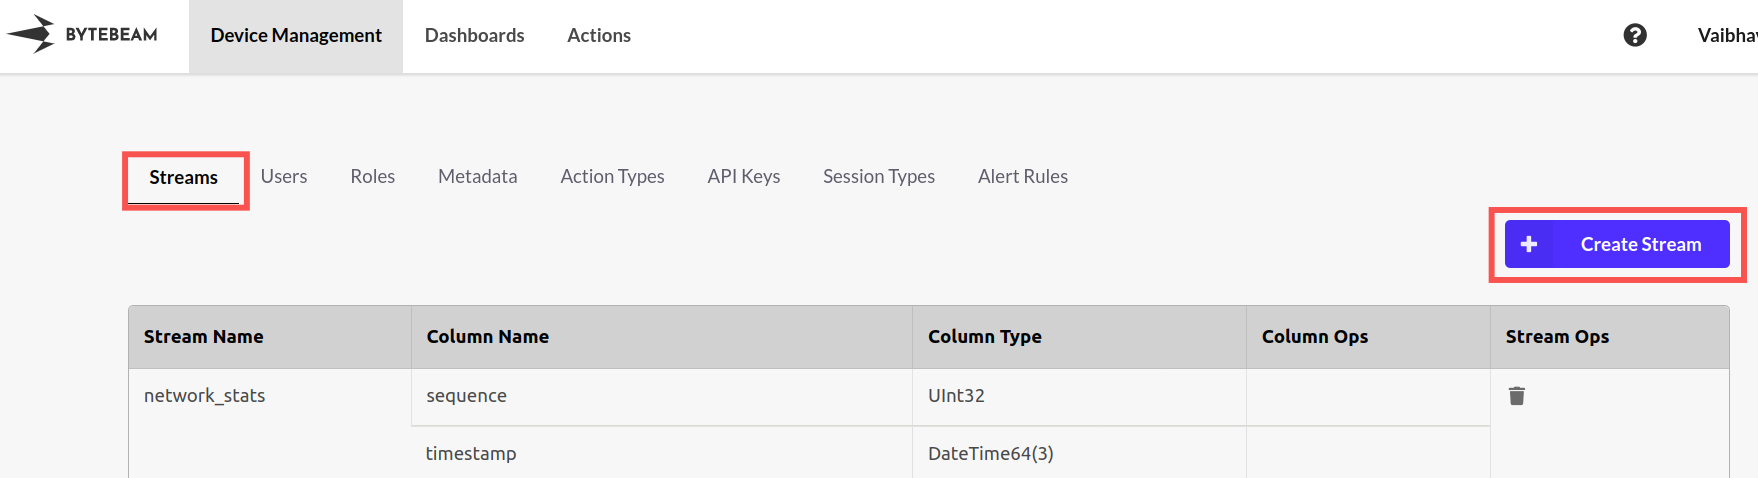
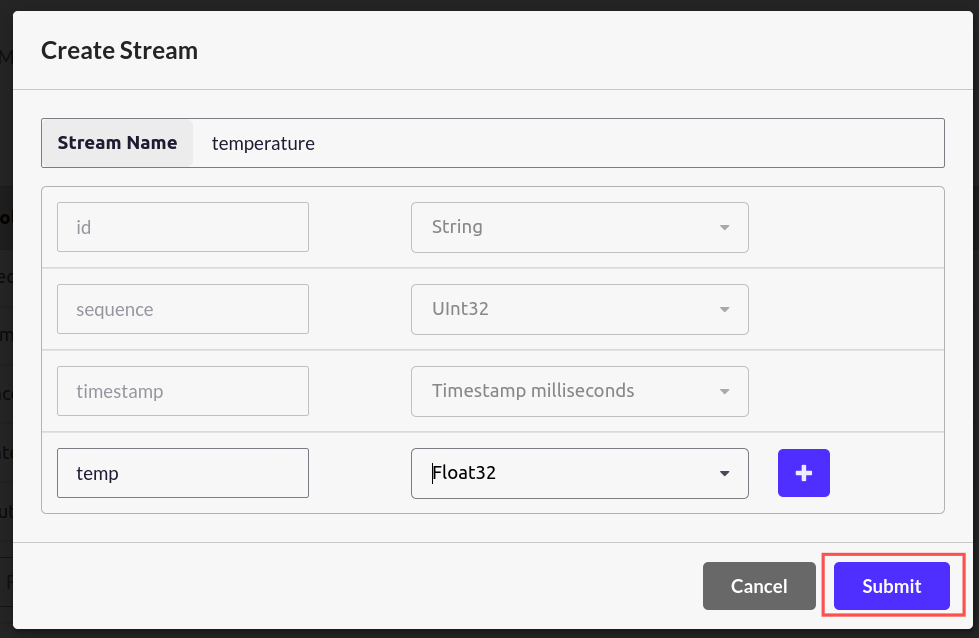
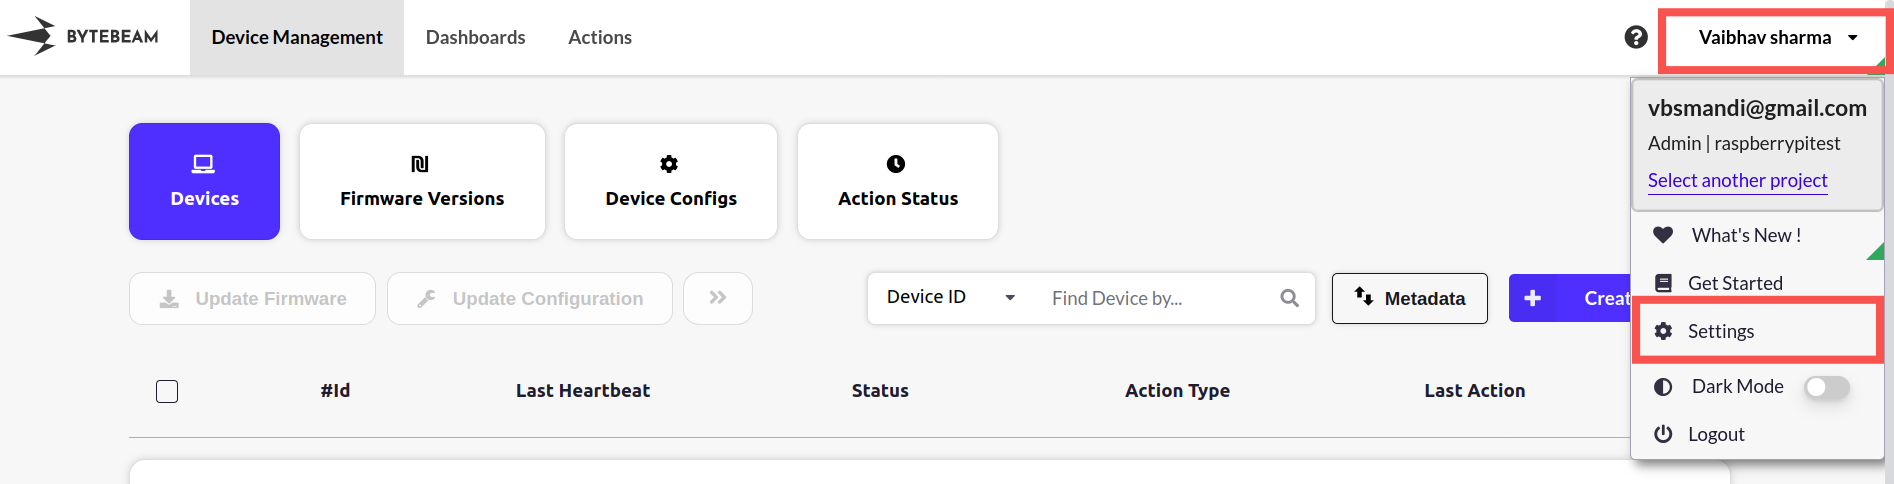 Next, select Streams and Click on “Create Stream”.
 Now, enter the stream name and column name. In this example, we have chosen the data type of temperature as Float64. Click on the “Submit” button.
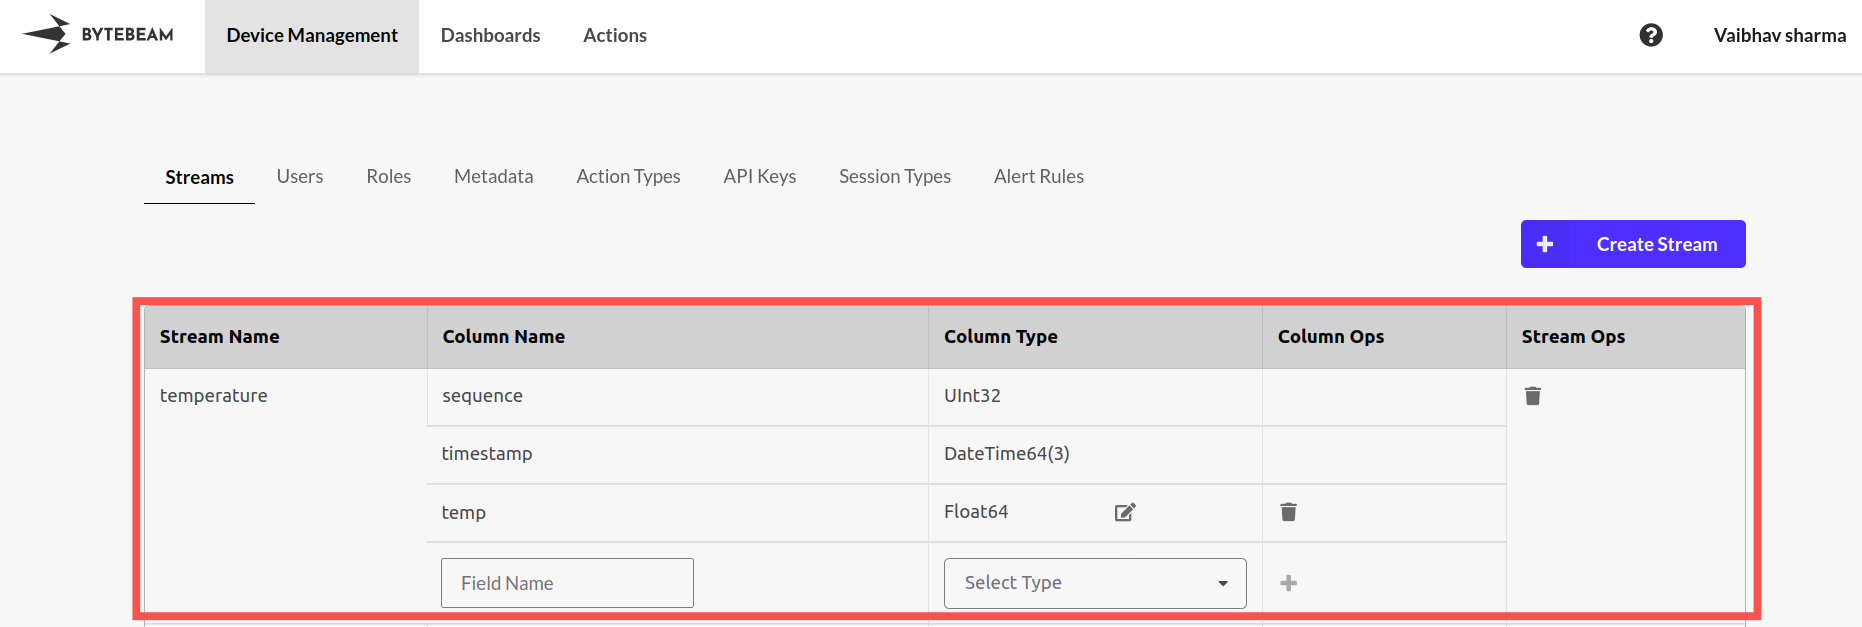
 The temperature stream should be visible under the “Streams” section.
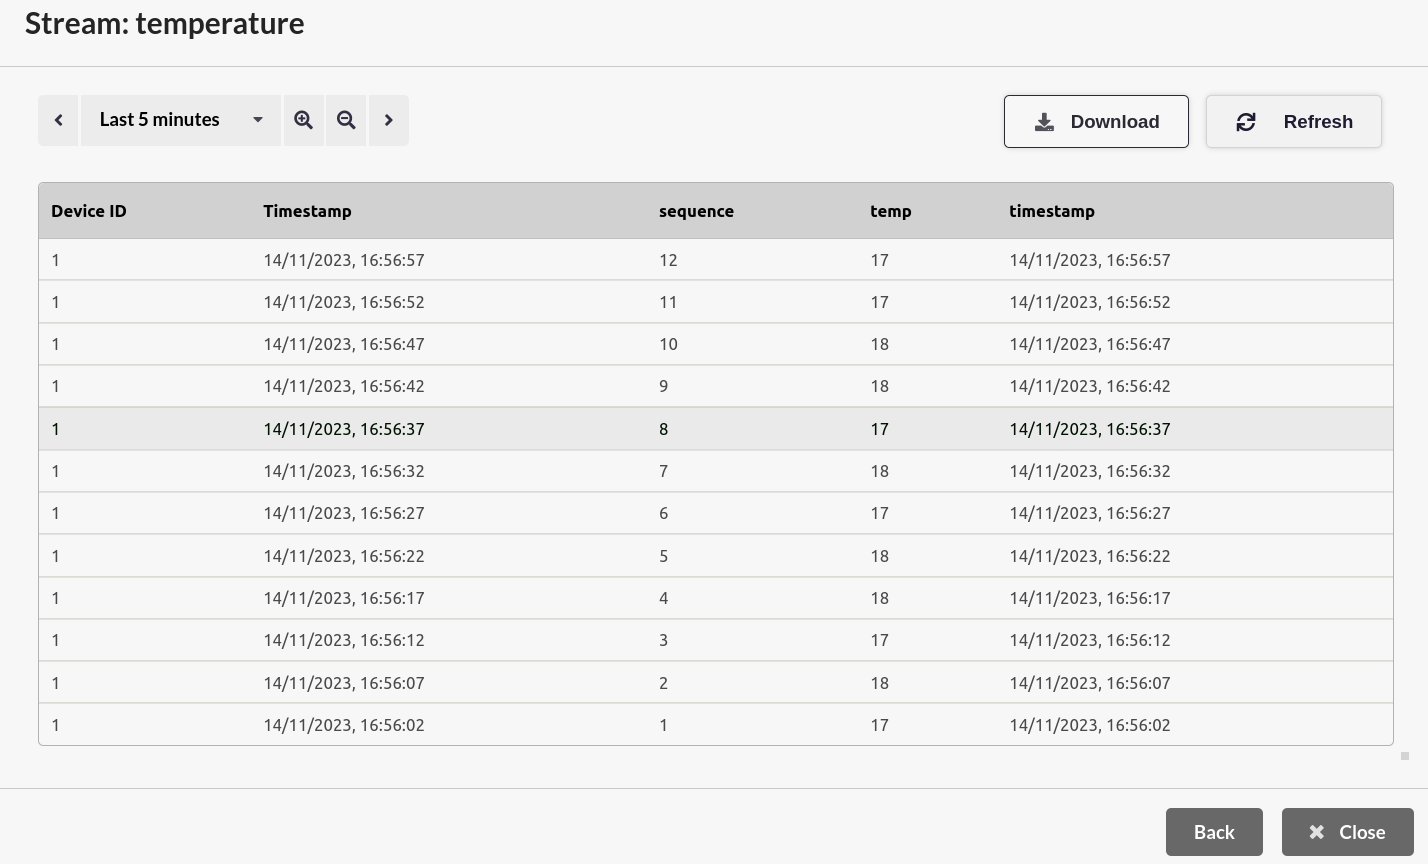
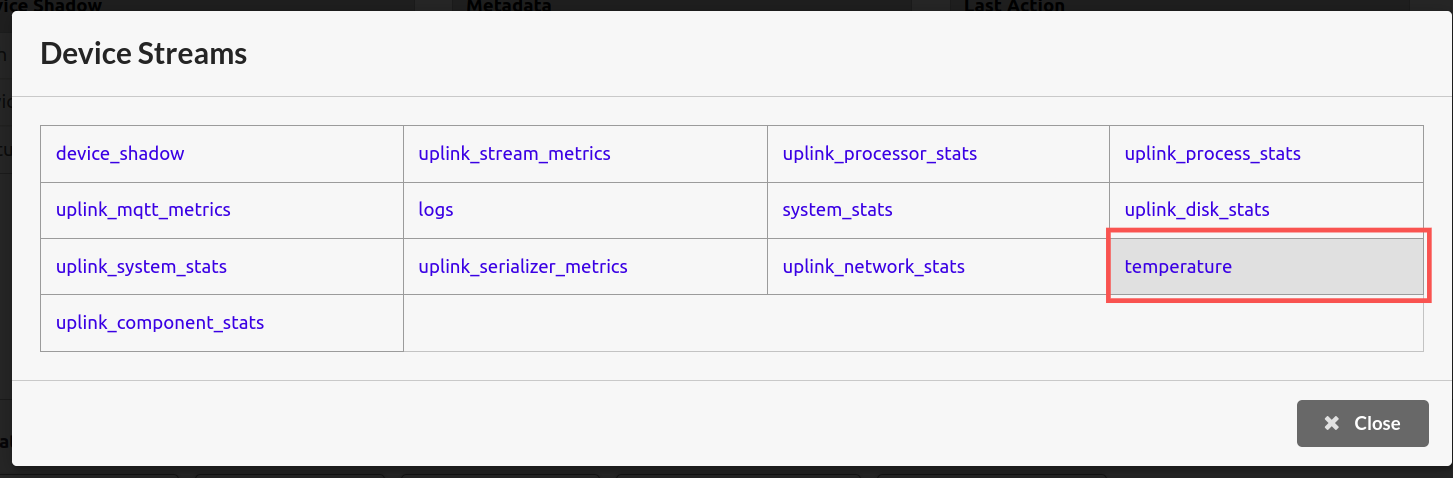 The temperature data should be visible on the cloud now.